2024-06-21
739
原创
zabbix 5.0安装及配置教程(Centos7)
zabbix 5.0安装及配置教程(Centos7)
这是官方文档链接,不懂的地方可以回来查官方文档。
https://www.zabbix.com/cn/download
废话不多说,直接开始搭建安装。
一、zabbix 5.0服务器端搭建
1.由于要监控多台服务器,为了更好区分不同服务器,最好更改系统名称,校准时间,并重启
1.修改主机名称
[root@172-16-68-166 ~]  hostnamectl set-hostname zabbix
[root@172-16-68-166 ~]  reboot
[root@zabbix ~]

2.需要同步服务器时间,同步网络时间阿里云
[root@client ~] yum install ntpdate -y
[root@client ~] ntpdate -u ntp.aliyun.com
[root@client ~] systemctl enable ntpdate
3.统一配置时区,上海
[root@client ~] mv /etc/localtime{,.bak}
[root@client ~] ln -s /usr/share/zoneinfo/Asia/Shanghai /etc/localtime
2.查看本地IP,后续需要通过IP登录,并关闭SELINUX和防火墙,需要重启才能生效,disable是永久关闭(不会开启自启动)
[root@zabbix ~] sed -i 's/SELINUX=enforcing/SELINUX=disabled/' /etc/selinux/config
[root@zabbix ~] systemctl stop --now firewalld
[root@zabbix ~] systemctl disable firewalld
[root@zabbix ~]  reboot
[root@zabbix ~] getenforce
Disabled
3.获取下载源链接,如果失效,请到官网确认链接
[root@zabbix ~]  rpm -Uvh https://mirrors.aliyun.com/zabbix/zabbix/5.0/rhel/7/x86_64/zabbix-release-5.0-1.el7.noarch
[root@zabbix ~]  yum clean all
4.查看安装的状态,并更换zabbix.repo的仓库源地址为国内阿里云镜像,并开启前端镜像源
[root@zabbix ~] ls /etc/yum.repos.d
CentOS-Base.repo       CentOS-fasttrack.repo  CentOS-Vault.repo
CentOS-CR.repo         CentOS-Media.repo      CentOS-x86_64-kernel.repo
CentOS-Debuginfo.repo  CentOS-Sources.repo    zabbix.repo
[root@zabbix ~] sed -i 's#http://repo.zabbix.com#https://mirrors.aliyun.com/zabbix#' /etc/yum.repos.d/zabbix.repo
[root@zabbix ~] vi /etc/yum.repos.d/zabbix.repo

[zabbix-frontend]
name=Zabbix Official Repository frontend - $basearch
baseurl=https://mirrors.aliyun.com/zabbix/zabbix/5.0/rhel/7/$basearch/frontend
enabled=1 #开启这里的参数,设置为1
gpgcheck=1
gpgkey=file:///etc/pki/rpm-gpg/RPM-GPG-KEY-ZABBIX-A14FE591
5.清空yum缓存,重新更新缓存,并安装zabbix服务器端mysql和监控代理客户端,因为自身也需要被监控
[root@zabbix ~] yum clean all
[root@zabbix ~] yum makecache
[root@zabbix ~] yum install zabbix-server-mysql zabbix-agent -y
6.安装软件工具,可以在同一系统中安装多个版本的软件,而不会干扰到机器。因为zabbix需要7.2.0以上版本的php,而yum默认安装的是5.4
[root@zabbix ~] yum install centos-release-scl -y
7.安装zabbix前端环境,且是安装在scl环境下
[root@zabbix opt] yum install zabbix-web-mysql-scl zabbix-apache-conf-scl -y
8.安装zabbix所需的数据库mariadb,并设置开机启动
[root@zabbix opt] yum install mariadb-server -y
[root@zabbix opt] systemctl enable --now mariadb
9.初始化数据库,并设置密码
[root@zabbix opt] mysql_secure_installation
#输入当前密码,初始化的密码为空,直接回车就行
Enter current password for root (enter for none):
#是否设置root密码,是,并重复两次设置创建的密码
Set root password? [Y/n] y
New password:
Re-enter new password:
Password updated successfully!
#是否移除匿名用户,是
Remove anonymous users? [Y/n] y
#是否禁止root远程登录,因为我们监控需要远程,所以不禁止
Disallow root login remotely? [Y/n] n
#是否删除测试数据库,测试数据库没用,所以要删除
Remove test database and access to it? [Y/n] y
#是否刷新授权表,是
Reload privilege tables now? [Y/n] y
10.登录mysql,添加数据库用户,以及zabbix需要的用户信息
[root@zabbix /]# mysql -uroot -p
Enter password:
MariaDB [(none)]> create database zabbix character set utf8 collate utf8_bin;
MariaDB [(none)]> create user zabbix@localhost identified by '你设置的密码';
MariaDB [(none)]> grant all privileges on zabbix.* to zabbix@localhost;
MariaDB [(none)]> GRANT ALL PRIVILEGES ON *.* TO 'root'@'%'IDENTIFIED BY 'root密码' WITH GRANT OPTION; //允许root远程链接
MariaDB [(none)]> flush privileges;
MariaDB [(none)]> exit;
11.导入数据库信息,可进入数据库查看导入成功与否
找到create.sql.gz数据库文件,
[root@host1 ~]# cd /usr/share/doc/zabbix-server-mysql-5.0.30/
[root@host1 zabbix-server-mysql-5.0.30]# ls
AUTHORS  ChangeLog  COPYING  create.sql.gz  double.sql  NEWS  README
解压,得到create.sql :
[root@host1 zabbix-server-mysql-5.0.30]# gunzip create.sql.gz
[root@host1 zabbix-server-mysql-5.0.30]# ls
AUTHORS  ChangeLog  COPYING  create.sql  double.sql  NEWS  README
登录mariadb数据库进行导入:
[root@host1 zabbix-server-mysql-5.0.30]# mysql -uroot -p
Enter password:
Welcome to the MariaDB monitor.  Commands end with ; or \g.
Your MariaDB connection id is 11
Server version: 5.5.68-MariaDB MariaDB Server

Copyright (c) 2000, 2018, Oracle, MariaDB Corporation Ab and others.

Type 'help;' or '\h' for help. Type '\c' to clear the current input statement.

MariaDB [(none)]> show databases;
+--------------------+
| Database           |
+--------------------+
| information_schema |
| mysql              |
| performance_schema |
| zabbix             |
+--------------------+
4 rows in set (0.00 sec)

MariaDB [(none)]> use zabbix;
Database changed
MariaDB [zabbix]> show tables;
Empty set (0.00 sec)

MariaDB [zabbix]> source create.sql; #导入命令

MariaDB [zabbix]> show tables; #查看表是否导入
12.修改/etc/zabbix/zabbix_server.conf配置文件
设置DBHost 和 DBPassword
[root@zabbix /]# vi /etc/zabbix/zabbix_server.conf

### Option: DBPassword
#       Database password.
#       Comment this line if no password is used.
#
# Mandatory: no
# Default:
DBPassword=你设置的密码
# DBHost=localhost
DBHost=localhost
13.修改zabbix的php配置文件
[root@zabbix /] vi /etc/opt/rh/rh-php72/php-fpm.d/zabbix.conf
#将时区改为中国上海
php_value[date.timezone] = Europe/Riga
改成以下:
php_value[date.timezone] = Asia/Shanghai
14.启动zabbix相关服务,并启用开机自启动
[root@zabbix /] systemctl restart zabbix-server zabbix-agent httpd rh-php72-php-fpm
[root@zabbix /] systemctl enable zabbix-server zabbix-agent httpd rh-php72-php-fpm
-----------------------------------------------也可以按照官网安装教程,方法一样-----------------------------
https://www.zabbix.com/cn/download?zabbix=5.0&os_distribution=centos&os_version=7&components=server_frontend_agent&db=mysql&ws=apache

二、zabbix 5.0网页界面的安装
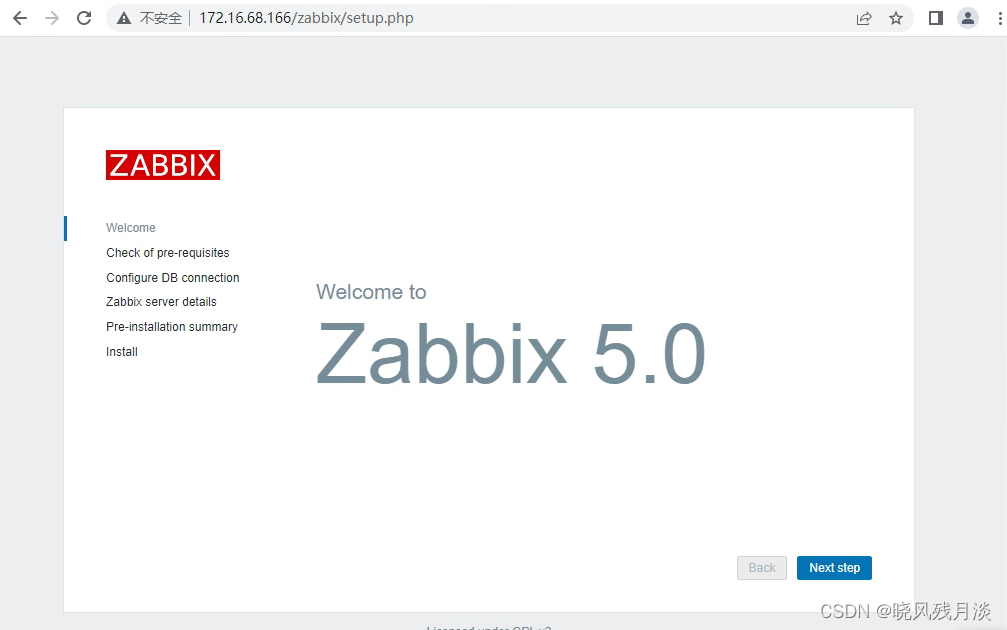
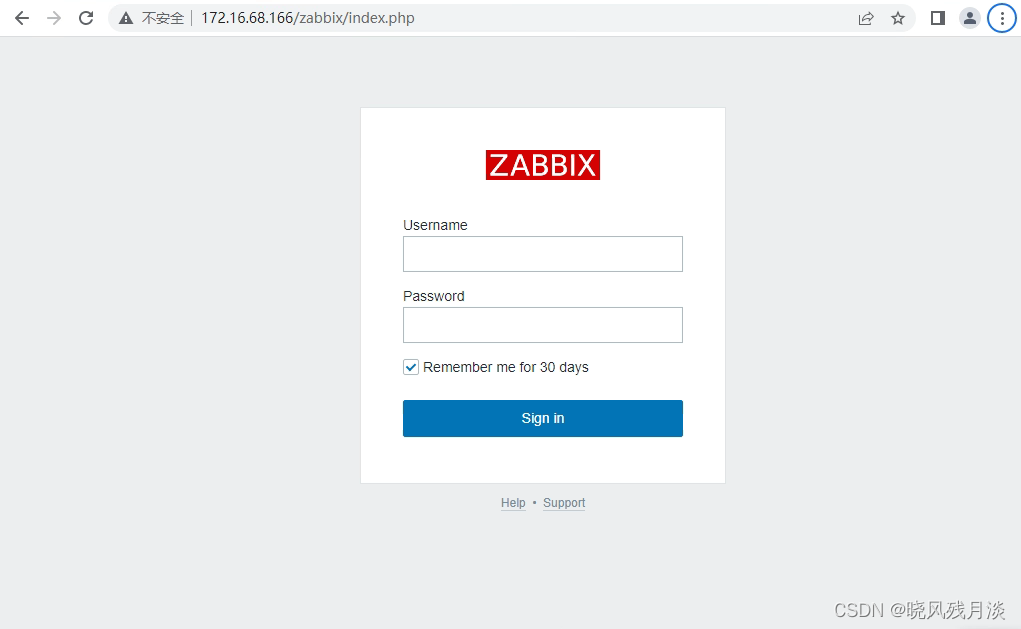
1.上述zabbix的搭建就完成了,接着在网页输入你的IP/zabbix就可以进行访问了,如果不能访问,记得检查防火墙 firewalld 有没有被关闭。
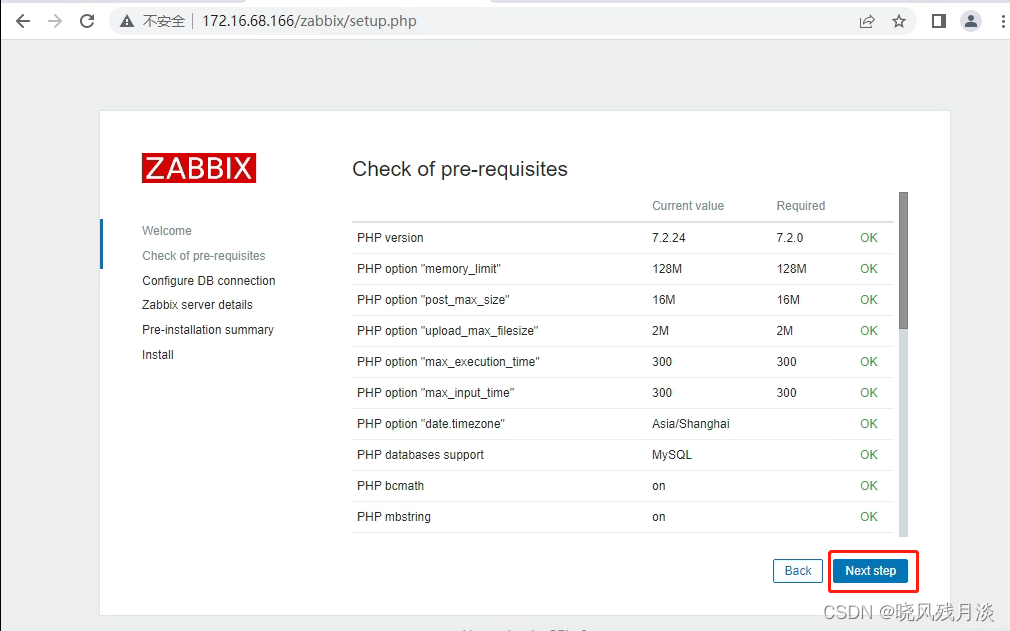
2.点击下一步,并检查环境是否都安装正确了。
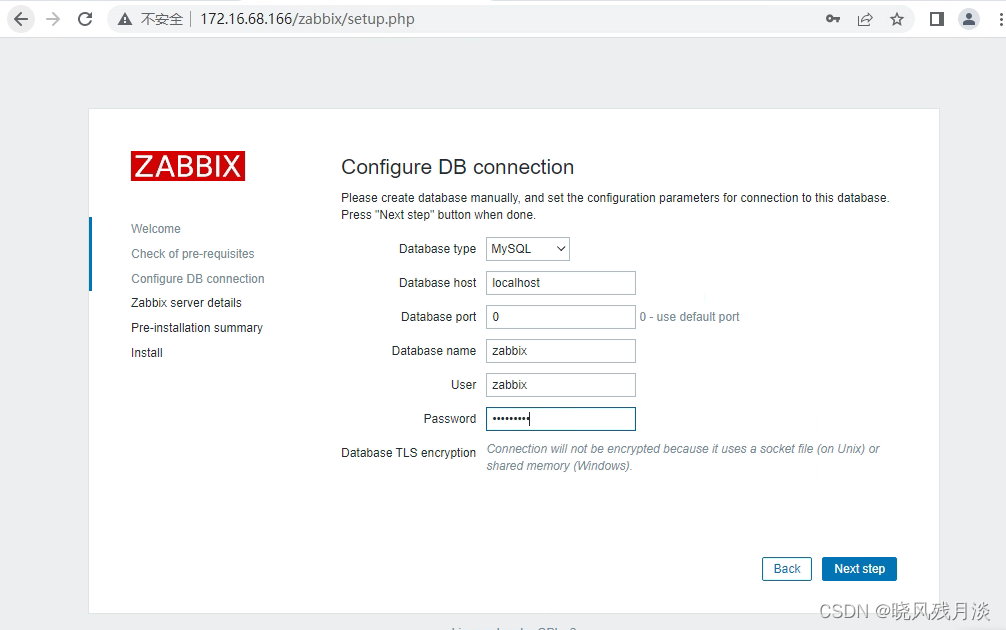
 3.天上之前设置的数据库密码,参考如图:
 4.这里跳过,直接下一步

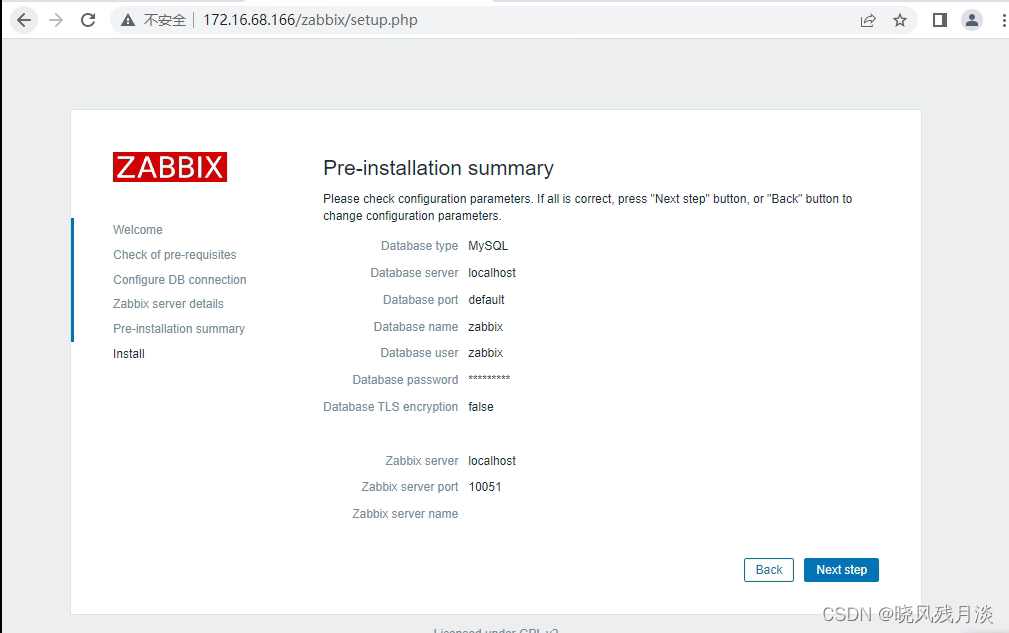
5.这里显示配置的信息,点击下一步
 6.点击下一步,显示安装成功!
 7.登录zabbix,默认的账号和密码是
Admin
zabbix
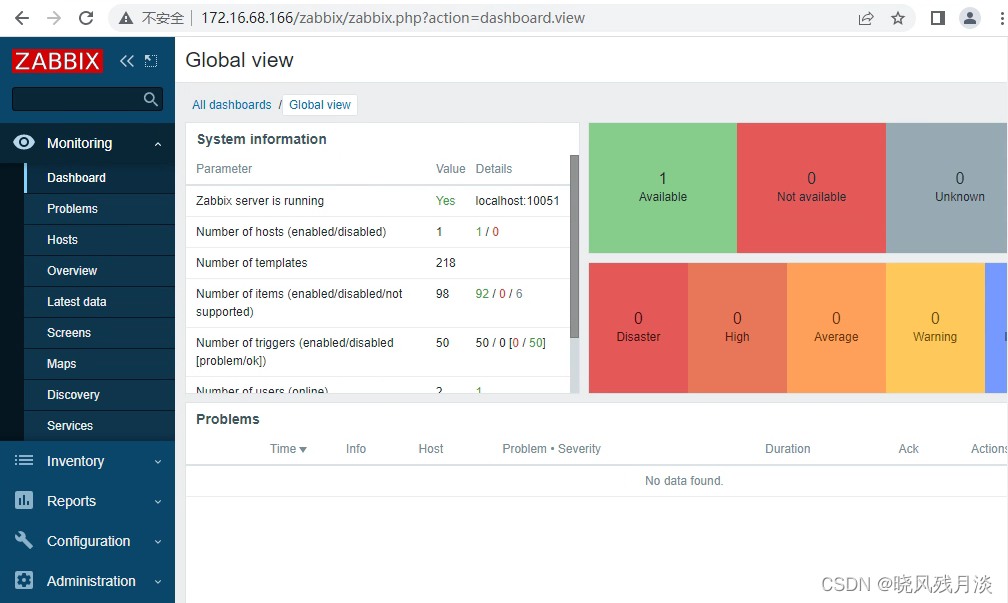
 8.成功登录后的界面如图
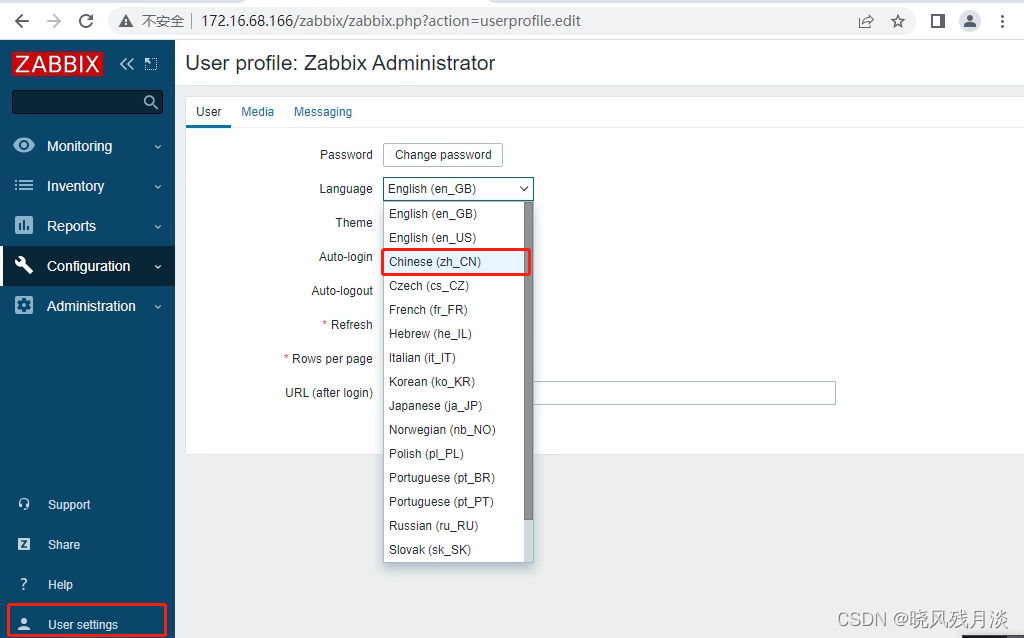
三、zabbix的使用
1.更改界面为中文
2.解决zabbix乱码的问题,这是中文编码不匹配导致的。
#在服务器端安装中文字体,并替换原有字体
[root@zabbix /]# yum -y install wqy-microhei-fonts
[root@zabbix /]# \cp /usr/share/fonts/wqy-microhei/wqy-microhei.ttc /usr/share/fonts/dejavu/DejaVuSans.ttf
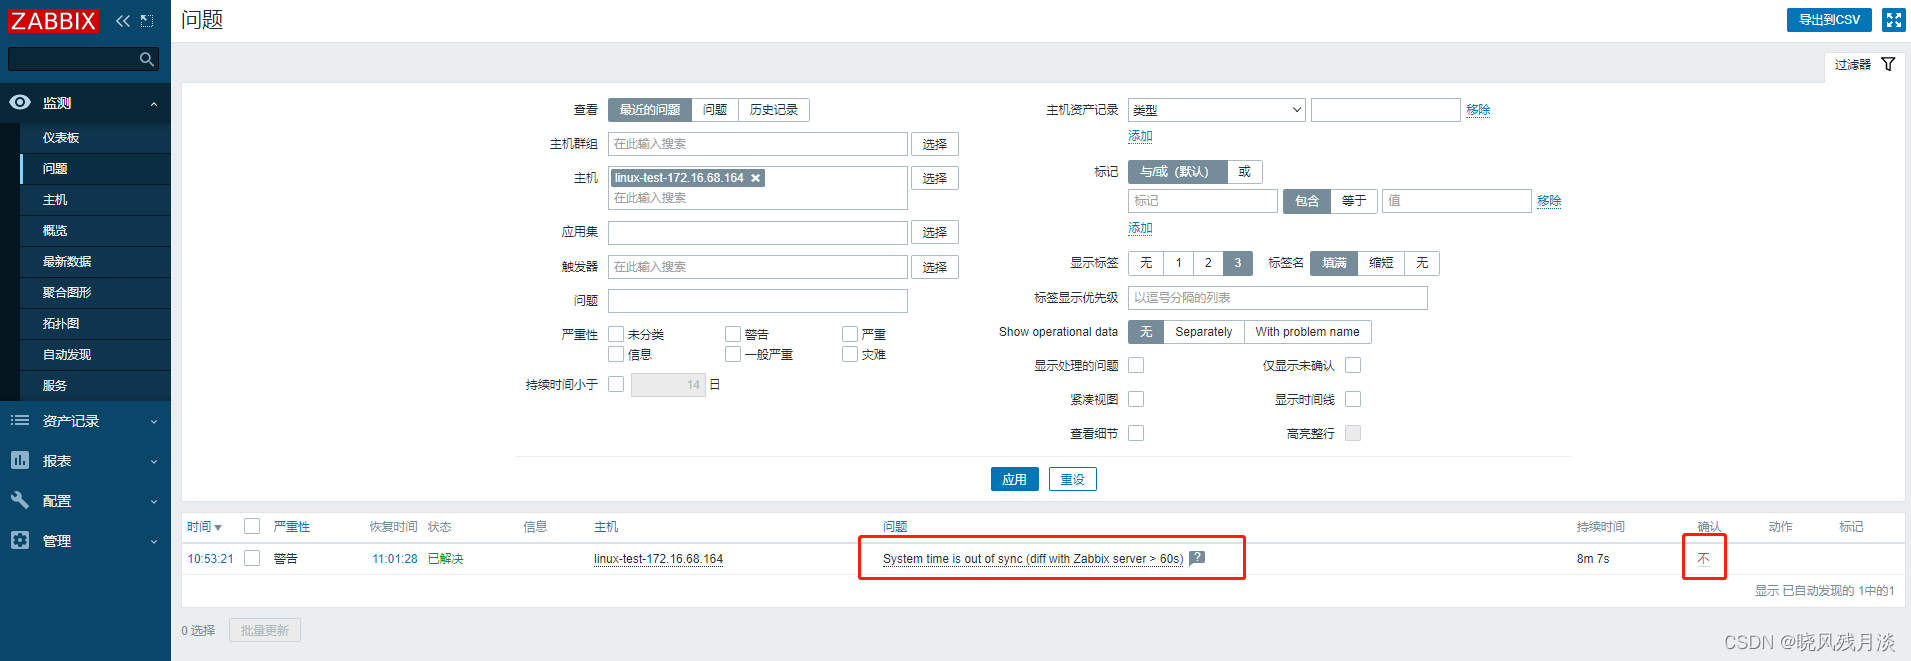
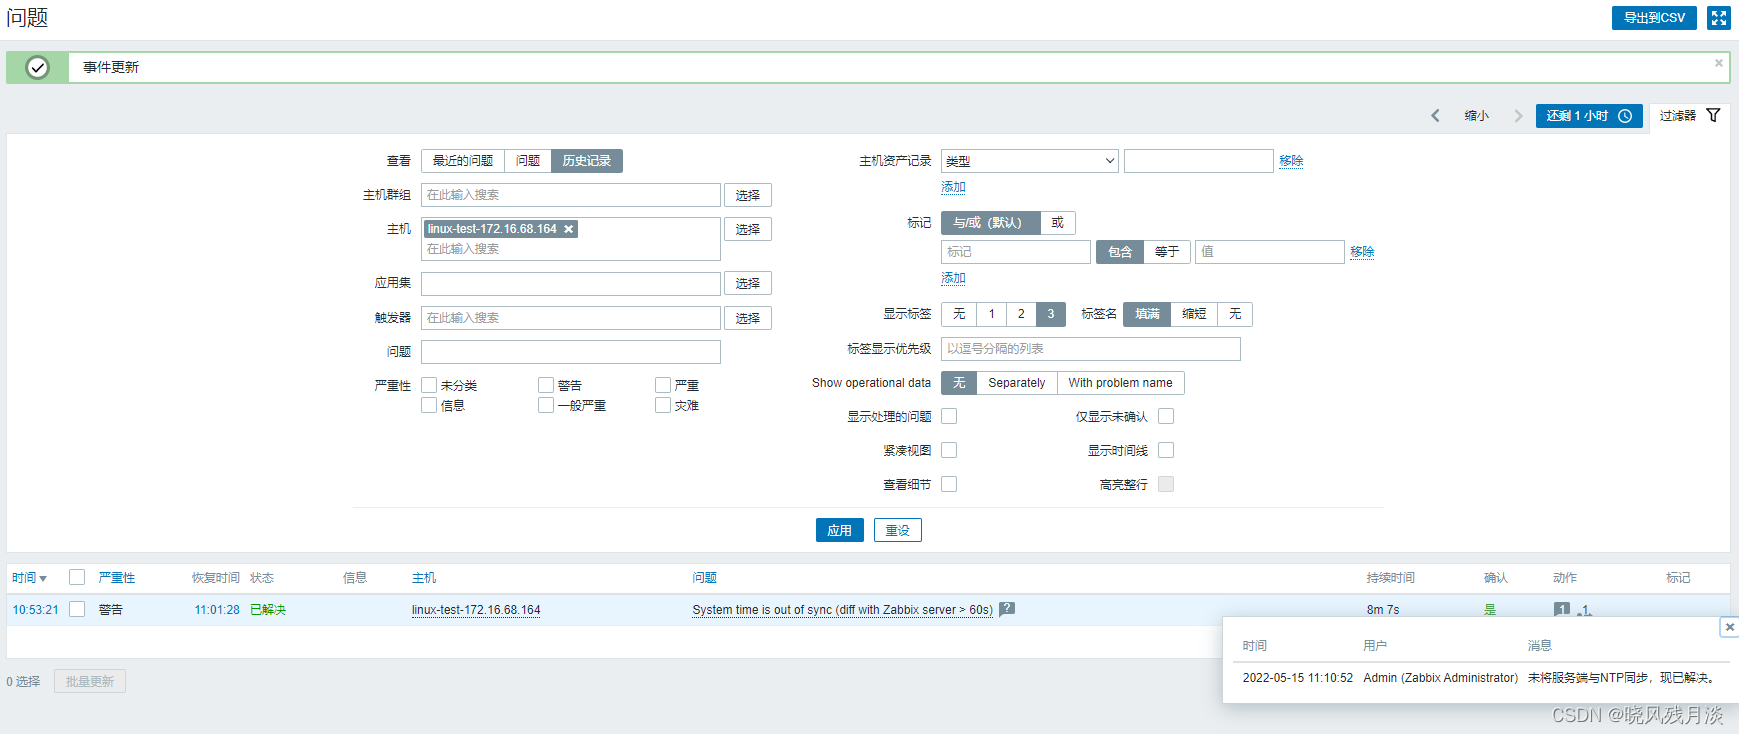
3.问题的处理
如图,客户端报了一个问题,zabbix客户端与zabbix服务器端时间差距超过60秒。
原因是我仅将客户端与NTP同步了,未将服务端与NTP同步,所以时间差距过大。
所以去处理好问题之后,点击确认的“不”这里,提交问题处理的信息进行确认。

四、zabbix客户端搭建
1.linux系统下的安装
zabbix5.0版本采用agent2新版本,该版本使用golang语言开发,使用10050端口。也可以去官网选择agent2安装命令安装。 去官网根据不同客户端系统,有对应的安装命令
-
旧版本的客户端 agent
-
golang新版本的客户端 agent2
1.机器环境准备,关闭防火墙
[root@client ~] systemctl stop --now firewalld
[root@client ~] getenforce
Disabled
2.由于时间的精确度对服务器的统计影响很大,所以需要同步时间服务器
[root@client ~] yum install ntpdate -y
[root@client ~] ntpdate  -u ntp.aliyun.com
3.统一配置时区
[root@client ~] mv /etc/localtime{,.bak}
[root@client ~] ln -s /usr/share/zoneinfo/Asia/Shanghai /etc/localtime
4.更新客户端的镜像源,并安装
[root@client ~] rpm -Uvh https://mirrors.aliyun.com/zabbix/zabbix/5.0/rhel/7/x86_64/zabbix-release-5.0-1.el7.noarch.rpm
[root@client ~] sed -i 's#http://repo.zabbix.com#https://mirrors.aliyun.com/zabbix#' /etc/yum.repos.d/zabbix.repo
[root@client ~] yum install zabbix-agent2 -y
5.检查是否安装成功
[root@client ~] ls -l /usr/sbin/zabbix_agent2
6.开机自启动并立即执行
[root@client ~]  systemctl enable --now zabbix-agent2
7.检查是否运行成功
[root@client ~] netstat -tnlp|grep zabbix
8.查看agent2的配置文件,并修改要推送信息的服务器端IP和自身的主机名
[root@client ~] grep -Ev '^#|^$' /etc/zabbix/zabbix_agent2.conf
 ---------------------------------------------------------------------
PidFile=/var/run/zabbix/zabbix_agent2.pid
LogFile=/var/log/zabbix/zabbix_agent2.log
LogFileSize=0
Server=127.0.0.1    #修改成zabbix服务器的IP地址
ServerActive=127.0.0.1 #修改成zabbix服务器的IP地址
Hostname=Zabbix server #自身的主机名称,web添加主机时要一样
Include=/etc/zabbix/zabbix_agent2.d/*.conf
ControlSocket=/tmp/agent.sock
 ---------------------------------------------------------------------
  [root@client /] vi /etc/zabbix/zabbix_agent2.conf
9.重启zabbix-agent2使配置文件生效
systemctl restart zabbix-agent2
在zabbix服务端需要装一个工具,验证与客户端的连通性
[root@zabbix ~] yum install zabbix-get -y
[root@zabbix ~] zabbix_get -s 你的客户端IP -p 10050 -k system.hostname
[root@zabbix ~] zabbix_get -s 192.168.1.201 -k system.hostname
其中“system.hostname” 返回该客户端的主机名,能返回说明能连通了,-p 是agent端口号,默认10050
2.windows下的安装
下载地址:https://cdn.zabbix.com/zabbix/binaries/stable/5.0/5.0.14/zabbix_agent2-5.0.14-windows-amd64-openssl.msi
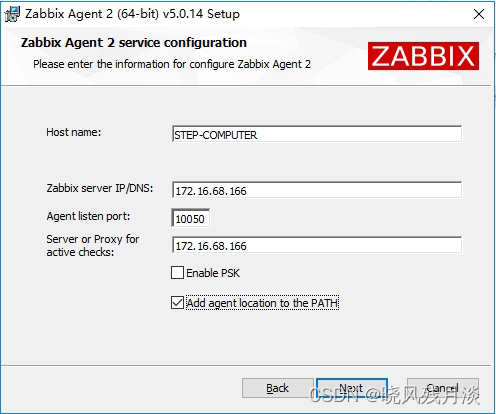
如图,填入主机名称、服务器端名称、端口,代理服务器IP(如有),加入agent到环境变量。
Host name需要和Zabbix服务端Web页面上设置的主机名称一致

如上图,输入services.msc开启服务,检查agent是否运行。
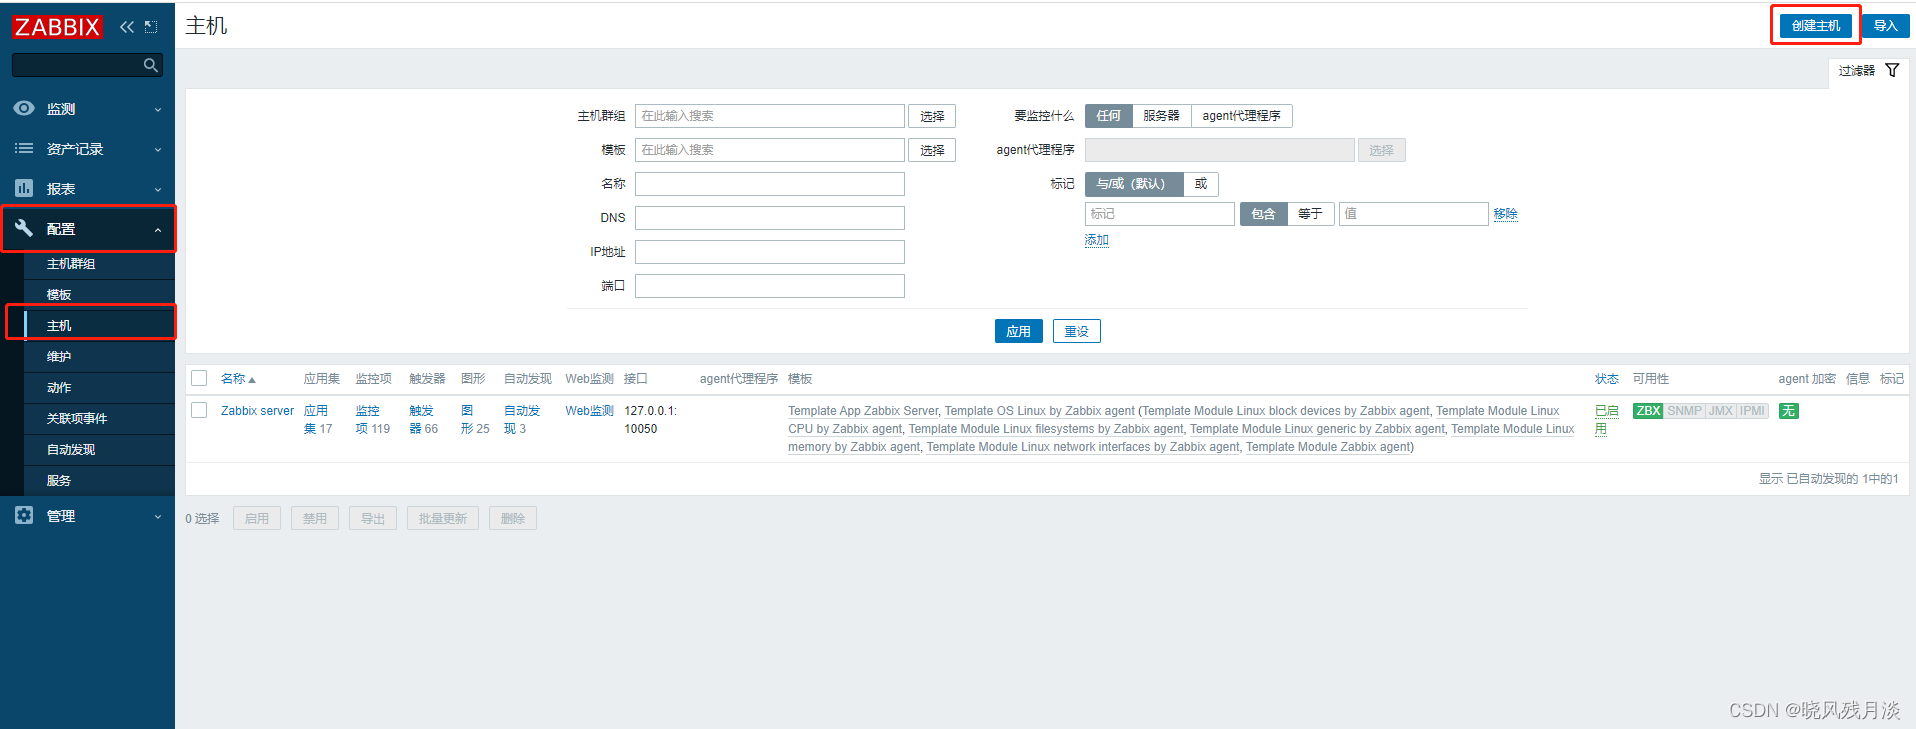
五、添加zabbix客户端主机
1.在菜单栏选择“配置-主机-创建主机”
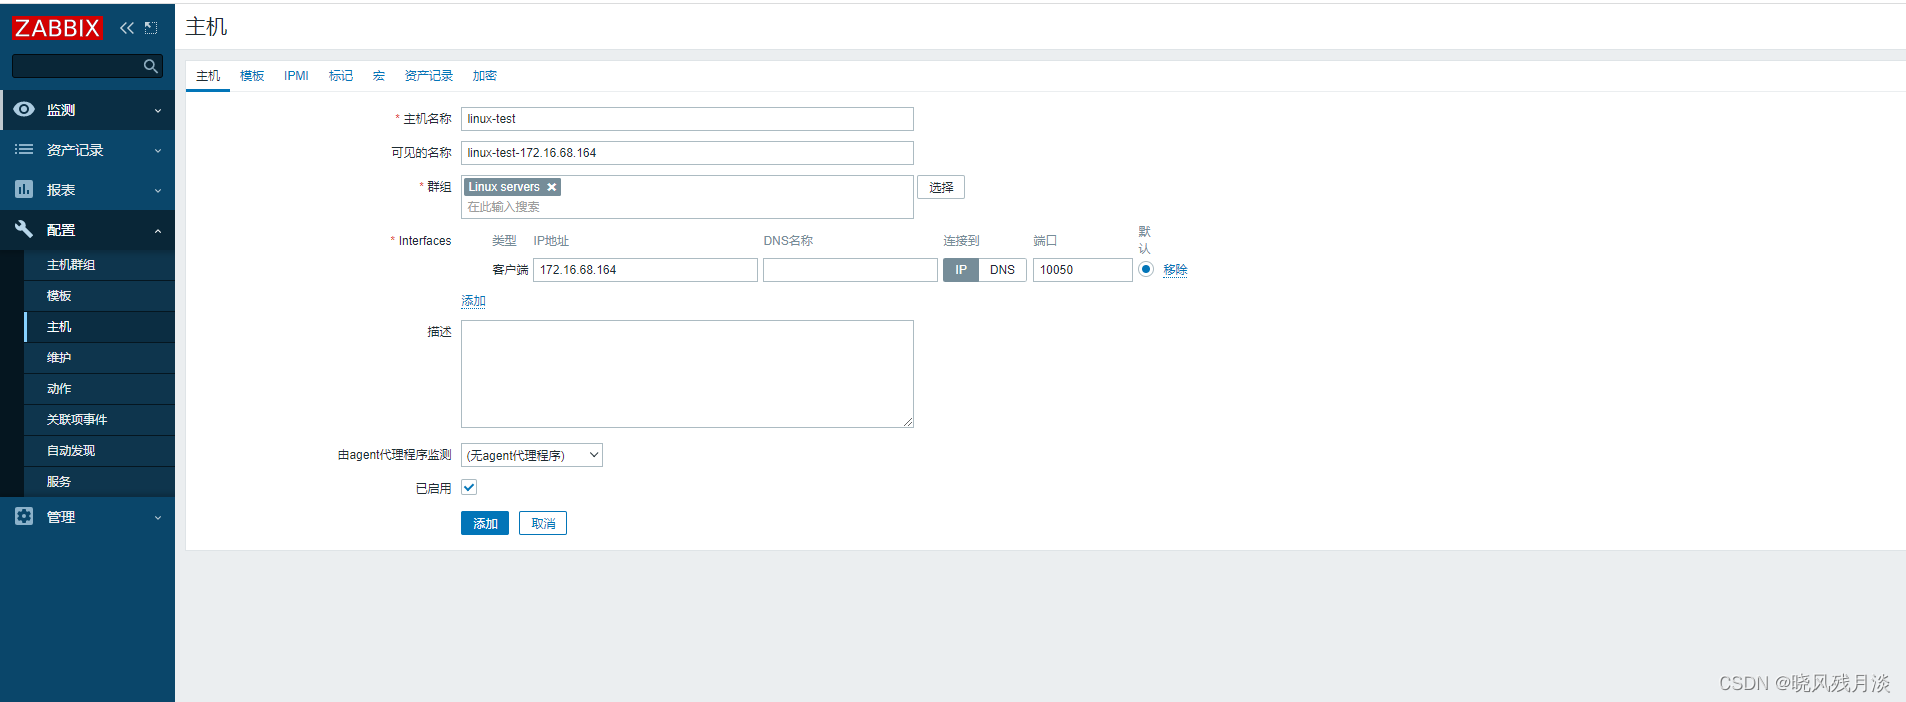
2.在主机页面填入以下信息
-
主机名称,需要与客户端的主机名称一致
-
可见名称,方便识别该主机,可自由取名
-
群组,由于我的客户端是linux服务器,所以归为
linux servers群组 -
客户端IP地址,填客户端的IP地址
-
DNS名称,由于我的客户端不需要域名解析,不需要填,若有,则可填
-
3.在第二项模板里,搜索linux选择使用
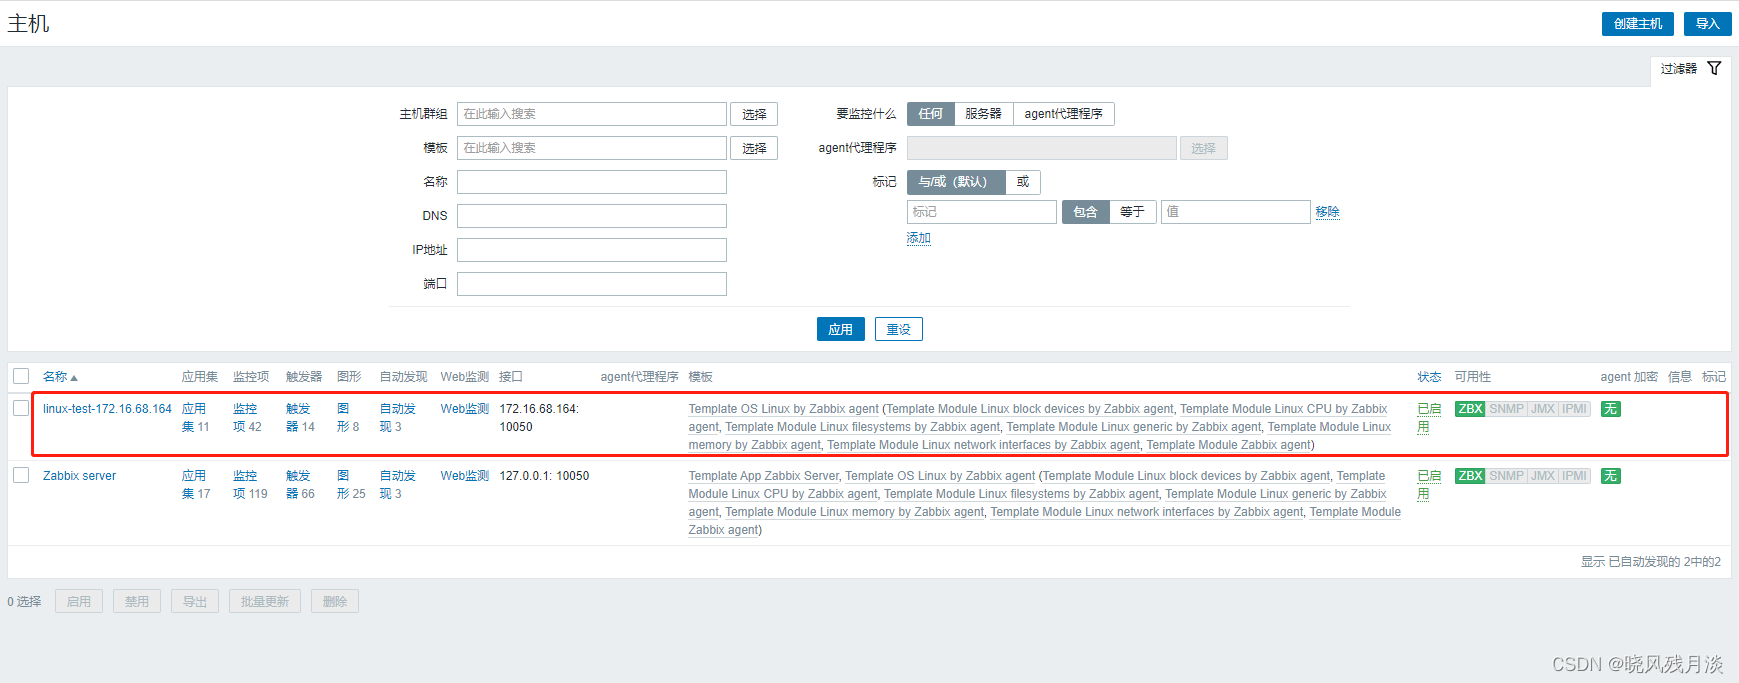
Template OS Linux by Zabbix agent的模板,并添加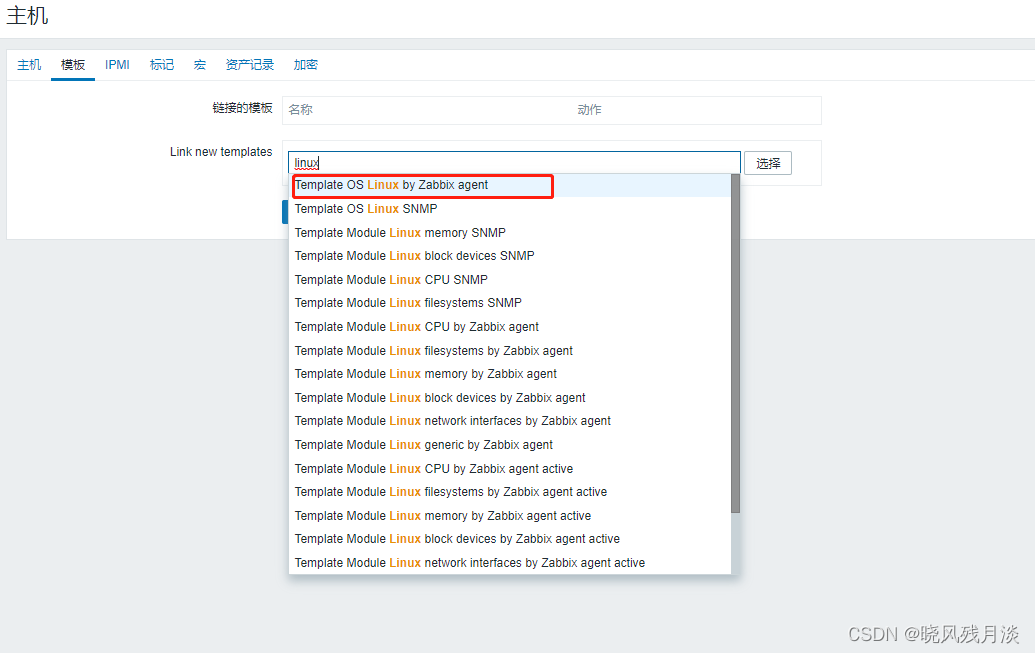 4.约几十秒后,主机的ZBX绿色亮起,说明添加成功了
教程